Warung Bebas
Tampilkan postingan dengan label Madoka Magica. Tampilkan semua postingan

Rabu, 09 Mei 2012

Puella Magi Madoka Magica: Homura Akemi Photoshoot

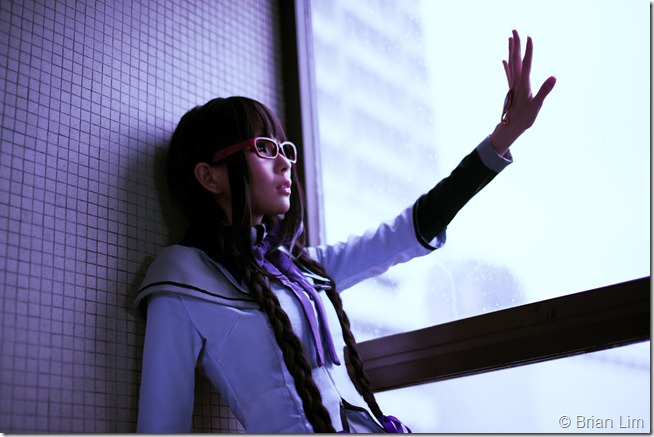
And so, after the first very rushed Mahou Shoujo Photoshoot, Brian and I realise we still have a lot of ideas running wild for Homura. Henceforth we decided to organise another photoshoot!

Information about how I made my costume –> here 

_DST4723

Photographer: Brian
Homura Akemi: Kaika
Lighting: Baracus
Helper: Maria & Cvy

The location for the shoot was suggested by Brian. And it turned out to be an awesome spot. Awfully overused but nice nonetheless xD

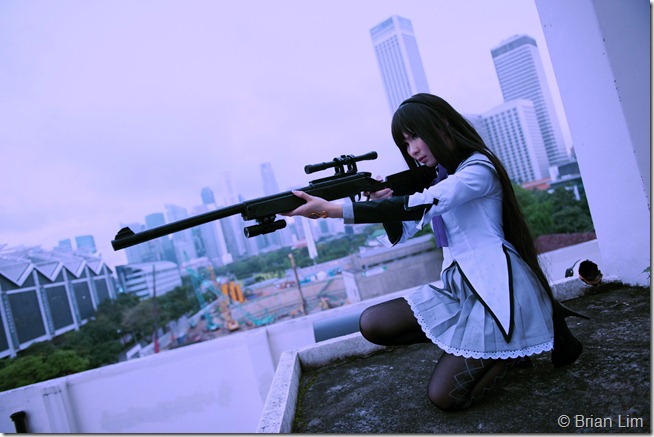
I was a careless klutz and totally forgot to prepare weapons for Homura. As any PMMM fans would know, she has an arsenal of them. Comparable to the military perhaps =_=; Since it was a reshoot photoshoot, we really wanted to have bigger guns for her so I borrowed them from Richard and another friend of Brian. Much thanks to Brian for helping me pick up the gun from Richard the morning of the shoot T___T! Super thankful to him and so many people for this shoot, pop over to my other blog if you’re keen to read my heartfelt talk about this.

IMG_1308

I did my full makeup at home then took a taxi down to the location while picking up Brian along the way. This is a camwhore I took in the Cab. Yes, I’m forever amazed at how much freakin makeup I can pile on my face but the moment I put on my costume and wig, they disappears O_O. Do you agree with me?? Comment and tell me so!

*More photos under cut*


_DST4599

Don’t mess with Homura!

Mad love how slim Brian made me look xD

_DST4601

_DST4635

I know the way I held the guns were amateurishly bad. Please forgive me >.<… I forgot to hold the gun in my right hand with the “Shooting” mode.

_DST4617

_DST4618

_DST4630

I know the effect would have been a lot better if I was a few inches closer to the edge. But seeing it was probably a 4 meter drop, I didn’t dare move any more. It might be impossible to tell, but it was actually drizzling when we took these pictures. We had only just reached the location and gotten ready before it started to rain.

So Brian and I decided to brave the drizzle before we lose anymore light. After so much preparations and work, we’re not going to get deterred by some puny rain!

_DST4663

Then I plaited my hair and became Megane Mura! We both agreed that Homura’s geeky past was an important factor that made up who she is now and was also what makes her so interesting/sad.

At this point we decided to get out of the rain and do some ‘cure’ shots while waiting for the rain to subside.

_DST4664


_DST4704

I can almost hear the puke =_=

_DST4707

IMG_1369

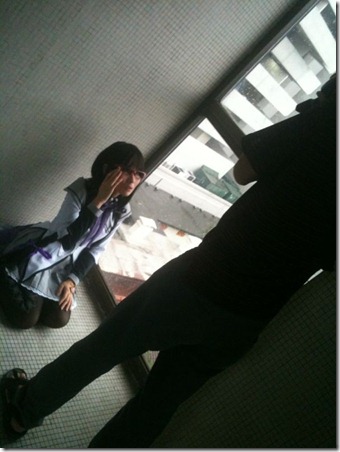
Some BTS photos from either Cvy or Maria ^^; Brian looks like a scary perpetrator here LOLJPEG Image (4540)

Another random BTS photo the helpers took xD. They were so bored they took our Cvy’s fan and start playing with it xDJPEG Image (4546)JPEG Image (4554)

More BTS photo of Brian hard at work. And the LCD on his camera is telling me Brian still owes me a lot of photographs!*looks at Brian*

_DST4712

Found the need to make a wacky face xD

Special thanks to Yuanie for lending me Homura’s socks and her shield! Just in case anyone’s interested, the red glasses were bought from Daiso and then sprayed over with Spray Paint.

I hope you guys liked the photos! It was a very fun photoshoot despite being the only cosplayer. We also got the chance to test out many things! There are still photos to churn out so look forward to part 2 soon! Leave a comment and tell me what you think xD!

Sabtu, 28 April 2012

How I made my Akemi Homura Costume

In this entry, I’ll share with you guys how I did my Akemi Homura costume. The costume looked really simple on first sight but as usual, it is not if you want to stay accurate.

_DST3814Homura_Akemi_Anime_Design

1) The White dress Top

IMG_1917

The white dress top was made with a very soft cloth, a sort of polyester satin mix. To avoid shining the cameras to death, I used the reverse side of the fabric. I’m a fan of using the reversed side of fabric for costume as they tend to give an interesting and subtle glean.

It’s an unusual choice of fabric. Like most people, I would usually go for polyester cotton or something similar since Homura's dress definitely looks opaque white. But in view of the fact that she wears another high collared top inside, I decided it is wiser to choose a fabric that is thin and allows for better ventilation. I don't fancy dehydrating in costume's xD

IMG_1904But I was really regretting my choice of fabric halfway through the construction of the dress. Because soft fabric like these tend to slide around and they are such a hassle to work with! And as usual, I screwed up the measurements many times.

I based my white top on a basic 1 piece dress pattern. I first drafted half of the dress pattern on paper to get the sizing right. As you can tell from the photo, I also used a marker to mark out where the shoulder flap would be to assist me in my visual gauging. After I made sure I got everything right, I proceed to add the shoulder flaps.

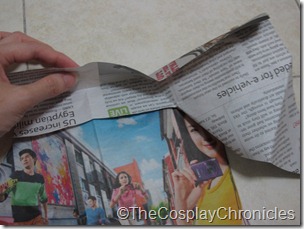
If you are not very confident in your dressmaking skills, my tip is to always test and trial with paper first! Even for the grey shoulder flaps, I tested with newspaper before cutting my fabric. 

Click on the picture to see in full.


After I was extremely convinced the white dress would fit me perfectly, I went ahead to mark out where the grey shoulder flaps would go. Making sure I leave an extra 1 inch of allowance, I then cut the extra fabric away.

IMG_1917

Using my trusty fabric glue, I glued very thin black ribbons onto the grey shoulder flaps just like how Homura has hers. And then hand stitched the grey shoulder flap onto the dress.

2) Black Inner top
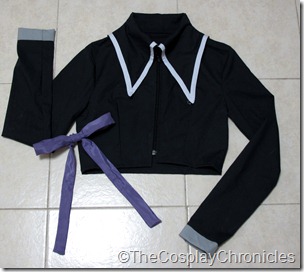
IMG_1921IMG_1925

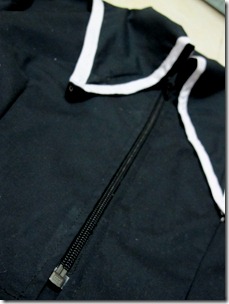
This is how the black inner top looks like. The zip in front starts below the throat and opens all the way to facilitate wearing. And as you can tell, I made it significantly shorter than my upper torso. The reason for designing it so, is to reduce the bulk of the costume around my waist so I’d look less fat and also for better ventilation.

IMG_1935

This is how the confusing collar looks like. It took me sooooooo many trials to get the right pattern ! I have seen many Homura costumers who created her collar by splitting it into a ‘collar ring’ and another addition flap. But I was insistent on making it a single flowing design just because I think it is nicer.

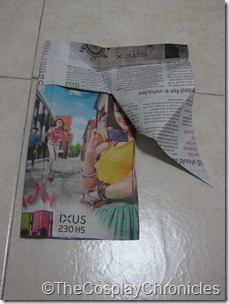
IMG_1907IMG_1908IMG_1909

This is my paper pattern for the collar. I made and remade so many of them I pretty much forgot which is the final one. LOL =x Don’t worry, this pattern should be fine =X

As usual, collars are always made with 2 layers (main cloth and a lining layer) to ensure the edges are nice.

IMG_1938

Sew the bias on after attaching the collar to the top.

3) Pleated Skirt

IMG_1303

I made her skirt as a tight knife pleat skirt with lace at the bottom. In fact, I was so lazy I didn’t even bother to make a new skirt. I just altered it from my Kuchiki Rukia Skirt xDD

Watch the video and read my blog entry to learn how to make a pleated skirt

4) Her hand accessory

IMG_1114

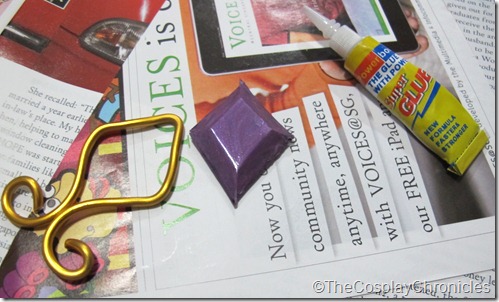
I panicked when I realised they don’t sell diamond shaped gems in the stores =_= So I had to make one myself (again!).

JPEG Image (44662)

The diamond gem is made with clear plastic sheet. The idea of it is the same as building a paper model, but with a strong plastic sheet instead.  I first tested the size and shape with a normal paper. After I was satisfied with the template, I traced it onto a piece of paper. I then laid my transparent plastic sheet over it and traced over it with a permanent marker.
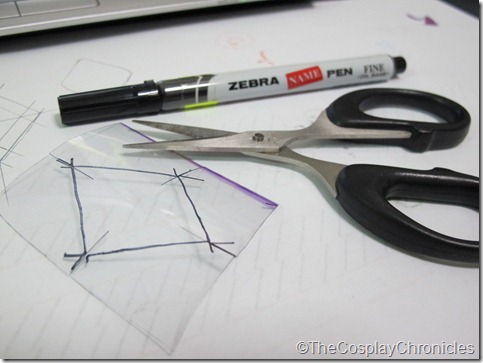
JPEG Image (44693)

The black lines are where to cut. I then create a wedge at the 4 corners of the plastic sheet and stick everything in place with a clear scotch tape. JPEG Image (27944)

Lastly, paint the gem. I used purple nail polish left over from my Mogami Kyoko (Prisoner) cosplay xD. My apologies for the lack of photographs. Didn’t have much time to snap progress photos >.< .

IMG_1952The plastic gem placed in the wire frame before colouring to gauge the size

Much like how I did my Alastor necklace (Shakugan no Shana), I made the edge of Homura’s accessory with Gold coloured wires.

IMG_1951

I placed the finished gem on a paper and traced the edges out. Then from the diamond base, I went on to draw out the rest of the accessory. This drawing will serve as a guideline for my wire.

87

What happens next is a lot of twisting and turning with my bare hands. To facilitate the sculpting process, I stuck the wire on to the paper with clear scotch tapes so the wire will stay in place.
JPEG Image (27944)

Super glue the gem to the wire frame.

IMG_1892IMG_1897

After my first photo-shoot, I had the unfortunate chance to discover that the super glue alone was not enough to hold the gem to the wire. So after that shoot,  I stuck a layer of gold adhesive tape to the bottom of the accessory to, hopefully, hold everything together better.

Finally done! Yes, I do understand it’s not very accurate but I tried my best T__T

5) The collar and back bows

IMG_1913IMG_1914

I was in such a rush the first time I made the costume I failed to think through each procedure properly. And ended up doing a pretty shameful job with the back bow.

photo 2

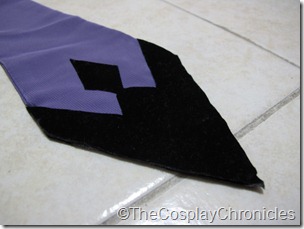
The black diamond-ish designs are cut outs from black felt. In order to know how to cut, I stuck the base of the ribbon onto a piece of paper and traced around it. Then draw out the design on the paper and cut it out as a template.

The bow is basically 2 layers of cloth, sewed and then turned inside out. The black diamond-ish designs are then cut and stuck onto both sides with my trusty fabric glue.

 IMG_1930

If you are making a Homura Akemi costume, remember to sew/stick the black diamond designs on FIRST before sewing the 2 layers of cloth (for the ribbon) together. I sewed and hot glued a big safety pin at the back for easy wearing.

IMG_1926IMG_1929

Using a similar procedure as the back ribbon, I made a long fabric tube for the front ribbon and then twist, cut, sew them together in place. A bendable wire was inserted into the top part (where my finger is touching) of the bow to keep it horizontal.

=============================================

Alright, this marks the end of my entry. If you enjoyed it, please leave me a comment ^^.

Rabu, 25 April 2012

Puella Magi Madoka Magica Photoshoot

And so, early this month, I scheduled a very last minute Mahou Shoujo (spare me the long name!) Photoshoot because I wanted to make use of the light instalments at the iLights Marina Bay . Even though I was already in the middle of making my Homura Akemi costume, it was still a mad rush to complete everything!

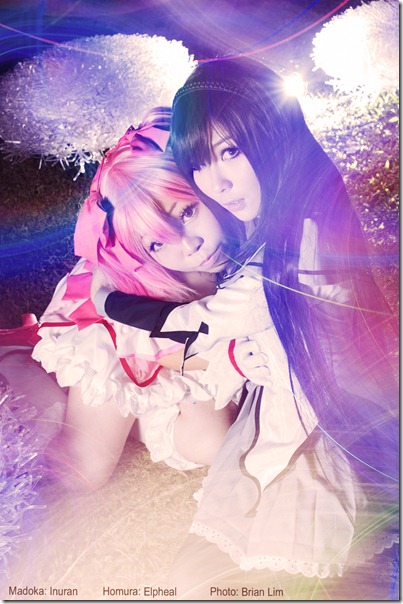
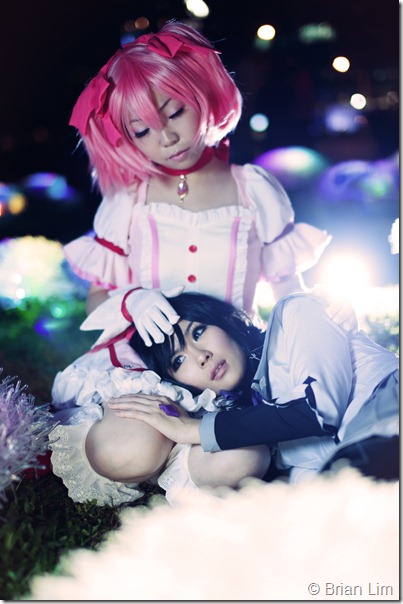
And thankfully, my Madoka was able to join me in the last minute! *kiss Inuran*

_DST4050 small

Kaname Madoka: Inuran
Homura Akemi: Kaika
Photographer: Brian

*More photos under cut*

_DST3872

It was the last day of the iLight Marina Bay exhibition and there was tonnes of people around >.< It was a constant struggle and embarrassment trying to get a good spot. Check out the people behind me >////< !!

It was deadly embarrassing but for the love of Cosplays, we persevered!

_DST4038

My lovely Madoka was the one who psychoed me to start on the series ( and sort of abandoned me halfway =_=).

Inuran was so MOE the entire shoot, cutesy character is definitely her thing. Unfortunately for fans of her, I will not be posting anymore photos of her Madoka here because I’m too lazy to get her approval as she has royally ordered so =x

Stalk Inuran on her DA!!!  _DST3967

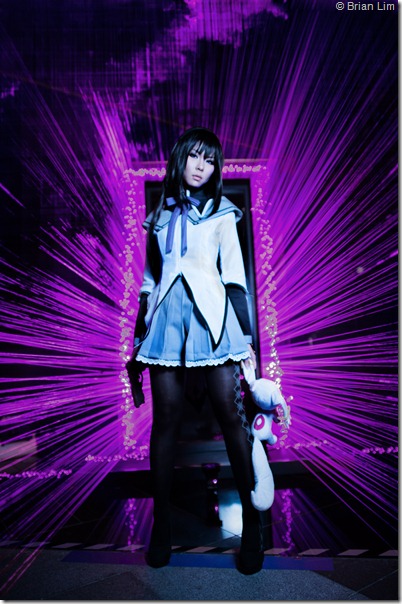
_DST3814

The LED light door! This particular instalment was the thing that pushed me to organise a shoot for it! While the original concept I wanted didn’t quite make it, I’m glad we got these 2 shots Open-mouthed smile Original Laser lights were red but photoshopped purpled to suit Homura Open-mouthed smile

Face horribly photoshopped because bottom up angle is always un-complimenting for my fat face=(

_DST3945 small

_DST4075-Edit-Edit-Edit

We also had the chance to have wings!!! Believe it or not, the wing is real! It has been slightly enhanced in Photoshop and of course, the photo has gone through some colour tuning but the presence of the wing is real!

It’s done by the amazing long exposure technique where I will stand still for 10 seconds while Brian uses an LED lamp to draw the wing in mid air. Very amazing *_*

_DST4067-Edit-3

With a similar technique, Brian went on to create this SUPER AMAZING photo above! Yes, the clocks are real!!!

Because I was in such a rush, I didn’t managed to create Homura’s shield and ended up borrowing it from Yuanie who very generously obliged T_T It’s great to have friends na T_T

_DST4088

Super awesome right T_T? My face could do with some photoshopping but I’m too lazy now. So just focus on the awesome LED clocks floating in the mid air alright Smile with tongue out?

More photos to come soon!

==================================

So much have been happening these days I can barely keep up! It is such a struggle to balance Cosplay with Blogging. Believe it or not, every entry on this Blog takes time to put together. I’m not sure whether is it my lack of linguistic calibre or my lagging netbook; but it is time consuming. I’m also struggling to find my place as a Cosplayer who also blog and now is known as a Cosplay Blogger LOL.

I digressed.

Anyway, leave a comment if you like the photos!

Twitter Delicious Facebook Digg Stumbleupon Favorites More

 
(˘̀^˘́҂)ҧ Design by uncensored8 | By Maling Durjana DMCA_logo-200w Pelacur Gratis Fast loading | Sexy Analytic (˘̀^˘́҂)ҧ